I love lipstick, but I’ve been trying to go more natural and healthy. This recipe for non-toxic lipstick sounds like an interesting option!
I’m definitely going to make it one of my winter crafts.
I love lipstick, but I’ve been trying to go more natural and healthy. This recipe for non-toxic lipstick sounds like an interesting option!
I’m definitely going to make it one of my winter crafts.
Earlier this week, my hair was feeling dry, dusty, and dirty! I had to do something about it. I knew I had to wash and retwist, but I was looking to try a clarifying wash on my hair for the first time. 
I researched and found a recipe for an Baking soda & ACV rinse. I followed the step-by-step instructions.
Watch the process here:
The result was a squeaky-clean scalp and refreshed locks. I followed up the rinse with a retwist and some loc knots.
Here are the results: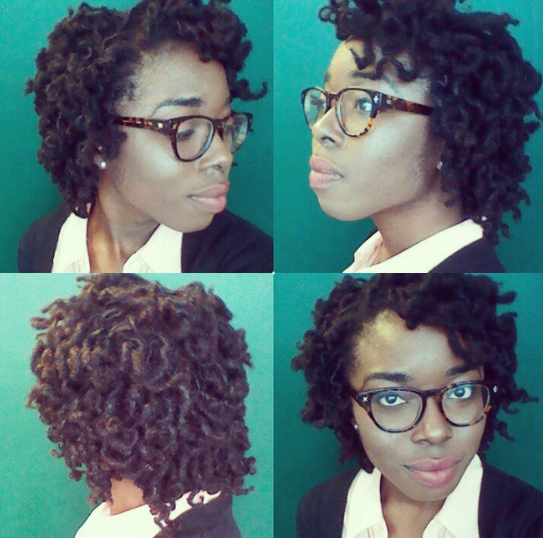
I noticed that my hair is always in curly styles so I never see how long my hair is. A friend took a length check picture for me and I was amazed by how much it’s grown!

The loc knot curls are very similar to the pipe cleaner curl, but a little less work to “install”.
See the video:
The curls held up, even though I only used water and no setting lotion. I love it!


On my last VEDA vlog, I asked for suggestions for my next hair style. You all voted for pipe cleaner curls. Here the are. I love them! Thanks for the suggestion!
I demonstrate how to make your own shea butter mixture. I had the privilege of being the host of the Natural Hair Conference and here I am doing a segment on “DIY Haircare From the Kitchen.” Enjoy this snippet.

I’m giving away away these green flats at my Clothes Swap on Sunday. I don’t wear them anymore but they’re still cute (except for the scuff in the front of one of the shoes). I’ll fix the scuff before the swap.
They were a solid green until I was inspired to give them a light green trim. I used neon yellow spray paint to give it a glow. I like how they turned out, but I’m still going to give them away. I want someone else to enjoy these flats.

I really like picture frames. I framed an inspiring student letter, inspiration greeting cards, awards, and family pictures. The Big Ben picture was my inspiration for the red accents.


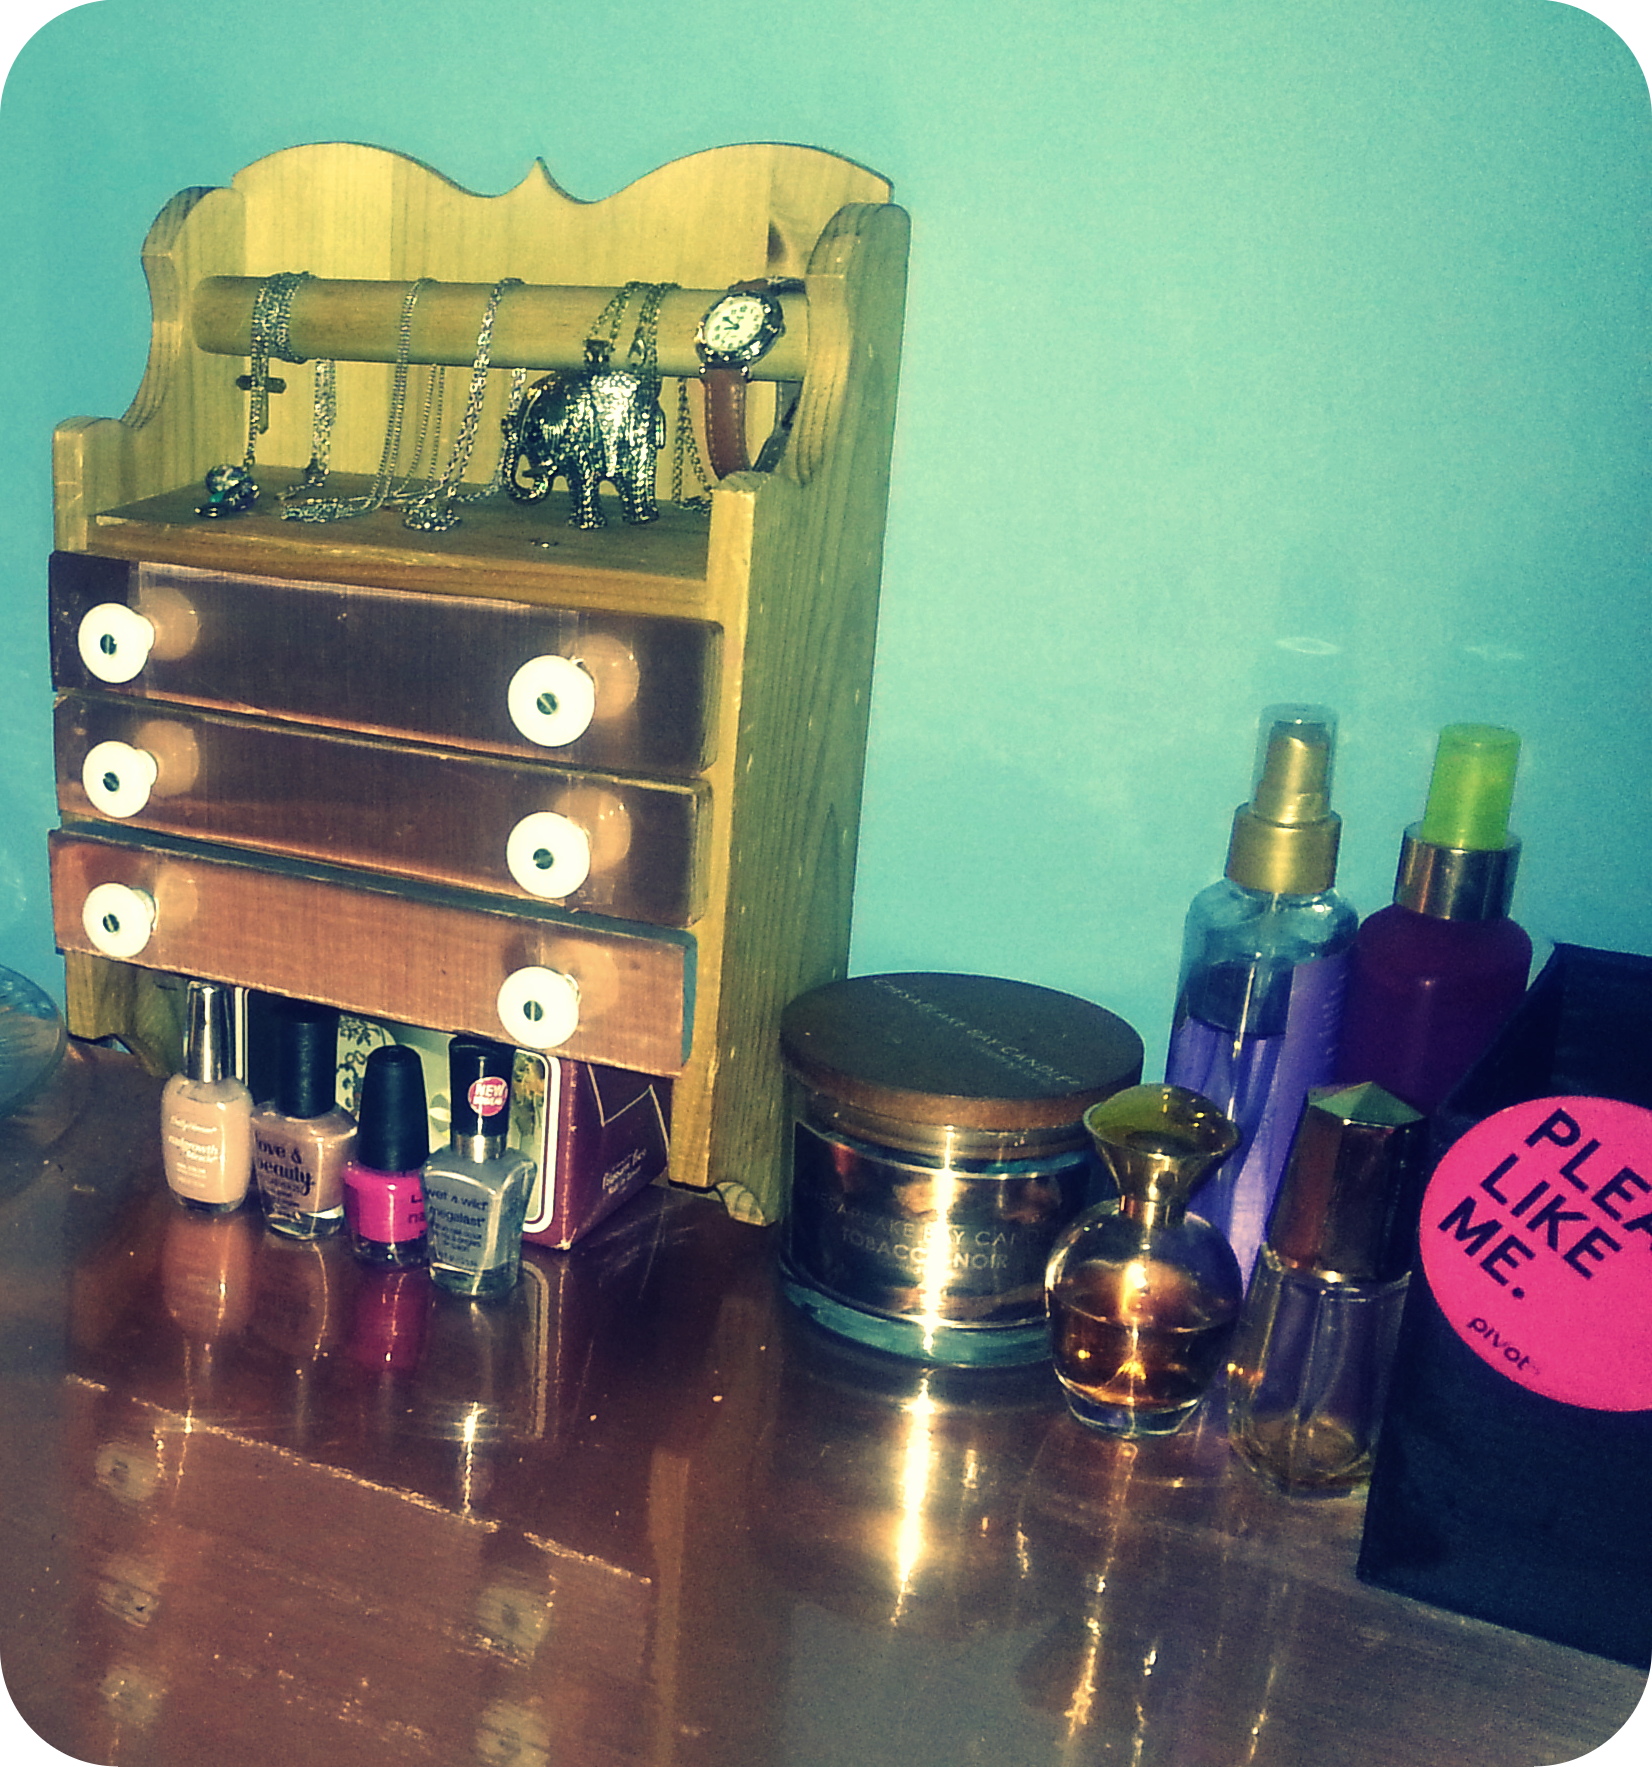
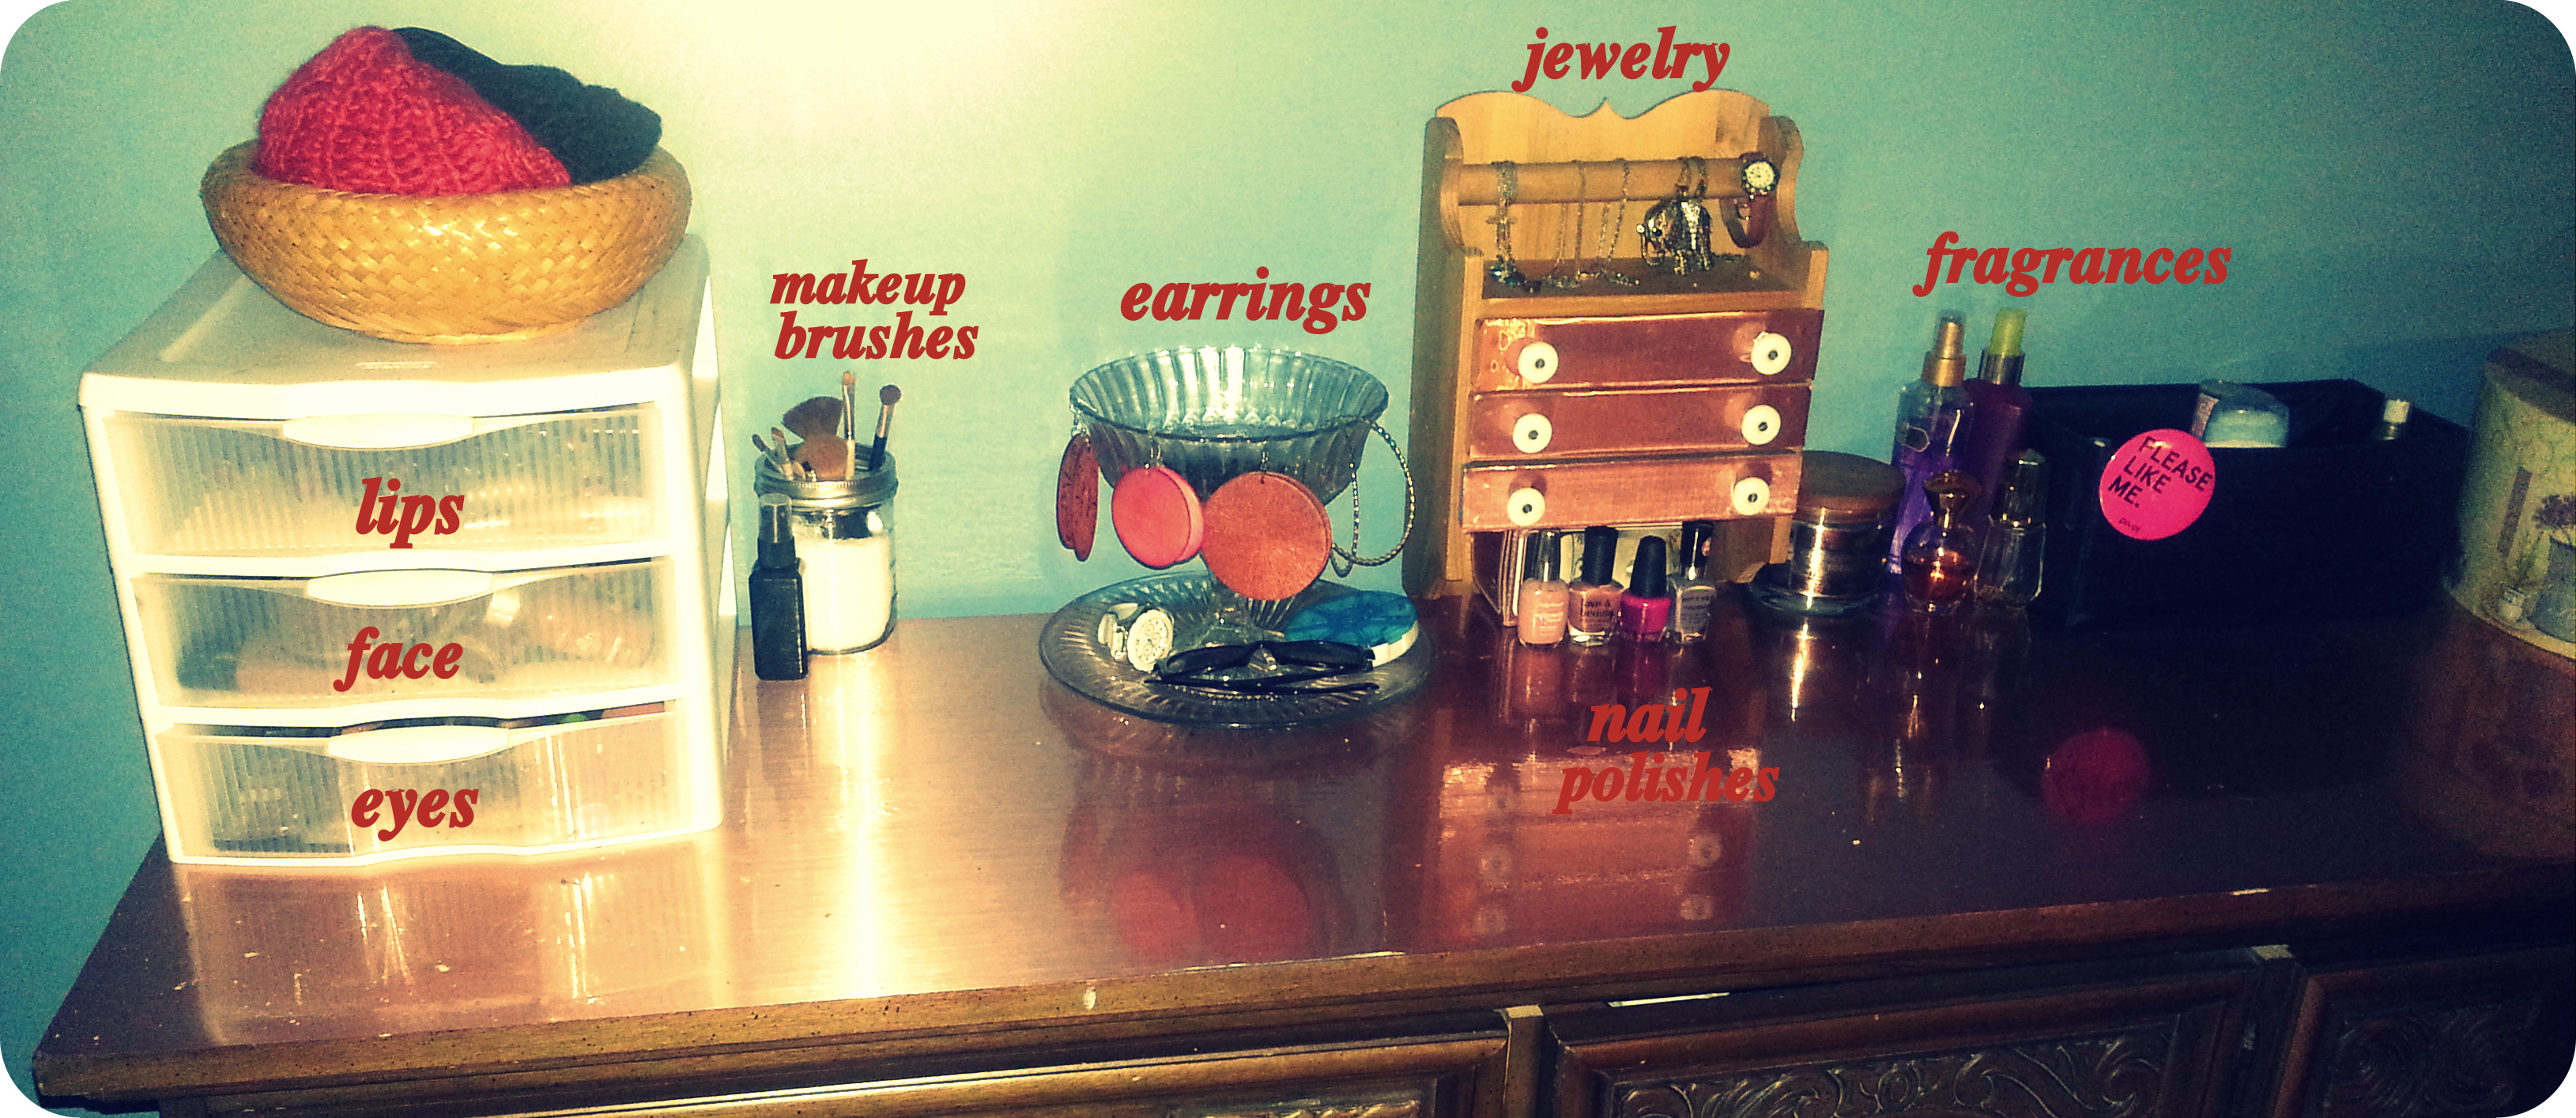
My vanity corner:
Check out my DIY earring hanger

It’s a neon spray-painted foil pan! I recently found some spray paint on sale and bought three different colors. There’s also a hanging hand mirror. This is my new vanity area.

I used this earring organizer to organize my small craft pieces. Notice I have a lot of buttons and jewelry-making items. I was planning on making button earrings. Now that I have my craft glue and super glue, I can start making them.
Jewelry box

Ring holder on the left, hoop earrings in the center, button earrings on the right.
Notice the medicine case. I put my earring studs in there. It’s much more portable when I’m going on traveling.
Lipstick collection

I’m proud of myself for not going out and buying tons of lipstick lately. My collection has virtually stayed the same except for a few lipsticks. I’m loving this Avon Everlasting “Forever Burgundy” shade.
DIY station


My bookshelf (which my dad and I assembled) doubles as my craft storage. I got these sturdy bins from Ikea and they have been steadily helping me organize my life. I am obsessed with DIY so all my tools must be in reach at all times.
My work space


Cute elephant speakers (sound comes from his feet)


For the longest time, I have been trying to find the perfect solitaire diamond necklace. I wanted one with a thin chain and a small round diamond. After combing through Amazon, Ebay, and etsy and not finding anything I liked within my price range, I headed over to Hobby Lobby to make my own.

Taadaaaa!
The chain was on clearance for $1.47 and the gem came in a pack of 6 or 8 for around $4. I say that’s money well spent. The search for the diamond necklace is over!